In the previous post we build a Terraform template for deploying multiple resources to Azure. In this second part I will automate the deployment with a VSTS build and release pipeline. And we’ll do it in such a way that we’ll use a serverless build agent, one which we spin up just before we need it, and spin down again once we’re done.
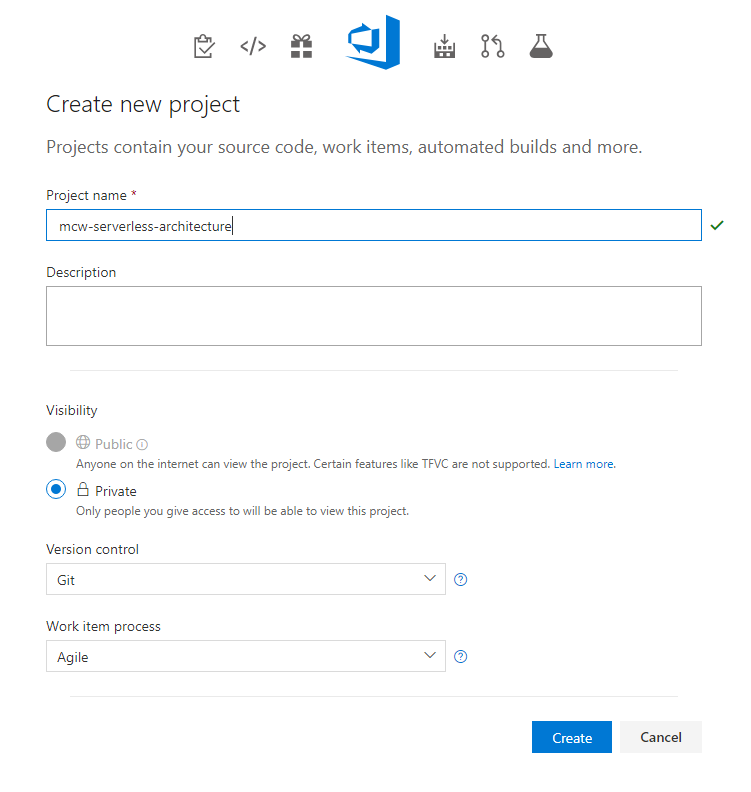
First thing you need is a VSTS project for the automation. Open up your vsts (someaccount.visualstudio.com) or create a new account and click ‘Create Project’. As you can see, I am already using the new VSTS layout, which I like a lot better compared to the old look and feel.

Fill out the name of your new VSTS project, choose whether you want your repo to be public or private, choose your source control system and the template you want to use. The default will often do. After filling this out click Create.
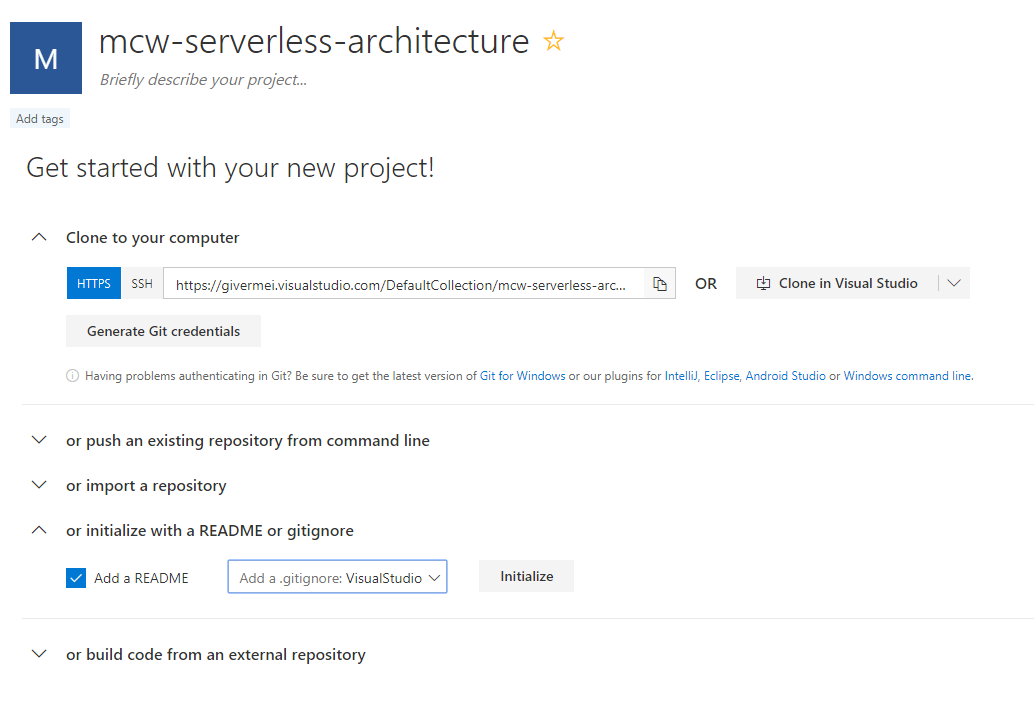
Once your project got created, initialize your repo with a default readme file. I choose the one for VisualStudio, since I will be mainly doing .Net development for this demo. We will later add additional statements for specific Terraform files, like the Terraform state and the Azure provider folder.
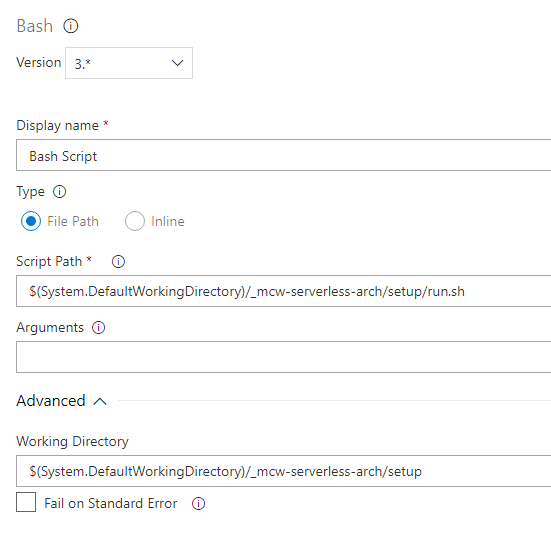
There are a couple of ways of getting the /setup folder from Part 1 of this blog post into this repo. Either you clone this repo locally, copy the /setup folder to it, alter the .gitignore file and do a commit and push. Or you perform a git init inside the folder where you created the /setup folder, you add the VSTS repo as a remote, perform a pull, alter the .gitignore file and commit and push. Whatever process you prefer, VSTS gives you a regular git repo, where you can add the /setup folder to.
I added the following statements to the .gitignore file specifically for Terraform:
# Terraform
.terraform/
.terraform.tfstate.lock.info
*.log
*.tfstate*
So, we now will create a build and a release pipeline. The build pipeline for now will just fetch our sources, so they are available for our release pipeline. Click the ‘Builds’ menu item on the left and click ‘+ New Pipeline’.

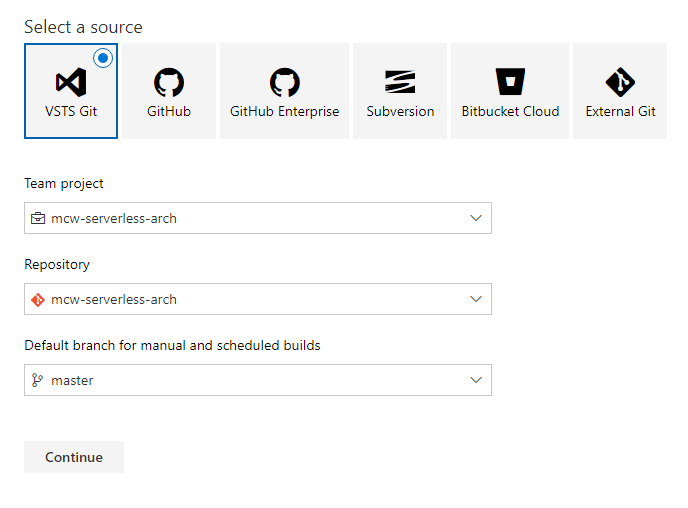
As a source we’ll take VSTS Git and make sure the correct project, repository and branch are indicated.
We’ll create our pipeline from the ‘Empty process’ template. In the pipeline, add a new task to the default phase by clicking the + sign right of the phase. We will add a ‘Copy Files’ task to the pipeline. For now we will just copy over the /setup folder.
Save your pipeline and queue a build.
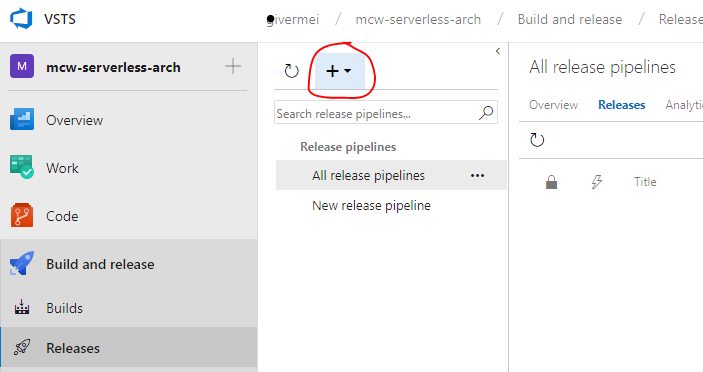
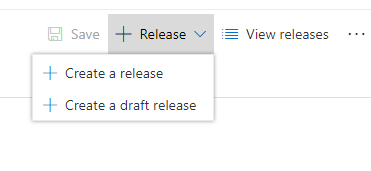
We can now create our release pipeline. Click on releases in the menu on the left and click the + sign and ‘create a release pipeline’.
From the choices you now get, choose for ‘empty process’, since none of the predefined pipelines will actually be what we are looking for.

Give in a name for the environment of this first pipeline. I called mine Dev, since more environments will follow.
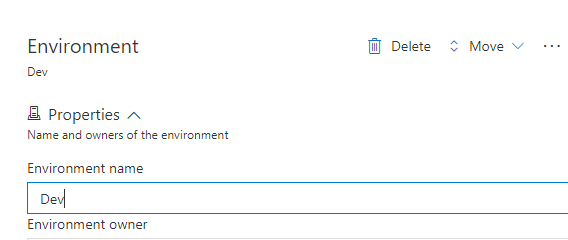
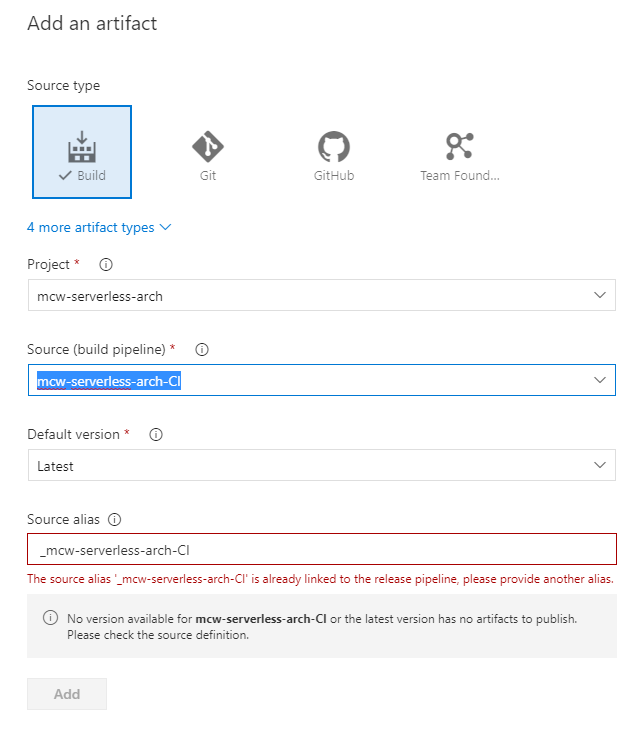
Once you renamed your pipeline, you can close this side-window. We will first add the artifacts from our build process to our release pipeline.
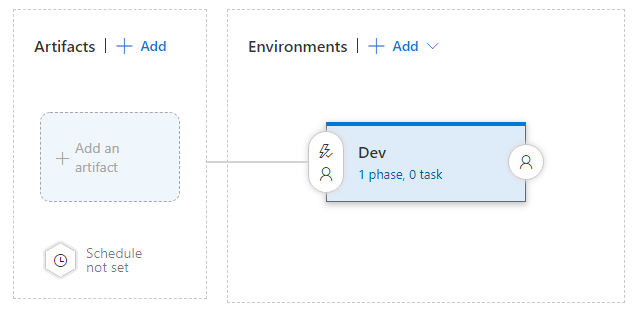
Once the artifact got added, click the ‘1 phase, 0 tasks’ link of the pipeline.
Your release pipeline already has 1 phase. I renamed the default phase to ‘deploy environment’. As for a build agent for this phase, we have a couple of options. The default agent type is VS2017, but there are also other options, like Ubuntu, windows container, … If you click the ‘Manage’ link, this will bring you to the agent pools page, where you can manage your agent types. Here you can also see the capabilities of the already installed agents.
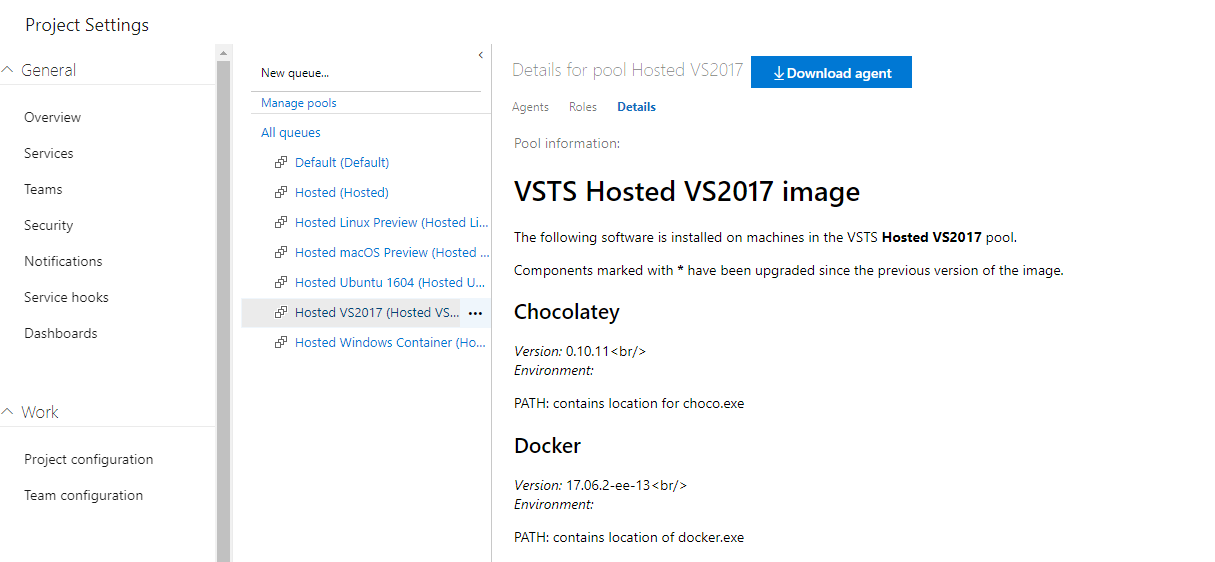
If you run through the capabilities of each agent, you will notice that none of the agents has Terraform installed. So either you create your own agent with Terraform on it, or you add an extra task to your pipeline for downloading terraform. Either process will work, each with their pro’s and cons. I will opt for the first way of working, since it will allow me to reuse this agent in other projects and since I’ll be running the agent on Azure Container Instance, it will be a cost effective way of running my agent.
Initially my custom build agent was based on this one, with a couple of small alterations. The image is based on the microsoft/vsts-agent image, which is a good base to start from, although as a downside, this base image is already 8.17Gb in size. From testing out this base image, it turned out ACI needed about 20 minutes to just perform the pull from dockerhub (I could speed this up a bit by using Azure Container Registry). This would not do for the lean serverless build pipeline I wanted to build.
So, instead, I started from a smaller base image as described here. This one is based on debian:stretch, and directly installs the vsts agent on the image. To create the custom build agent, make sure you have docker installed and it is running Linux containers. I started with a new folder with the following Dockerfile:
FROM debian:stretch

# Build-time metadata as defined at http://label-schema.org
LABEL org.label-schema.name="VSTS Agent with Terraform Tools" \
    org.label-schema.url="https://github.com/vermegi/" \
    org.label-schema.vcs-url="https://github.com/vermegi/vsts-agent-terraform" \
    org.label-schema.schema-version="1.0"

ENV TERRAFORM_VERSION 0.11.8
ENV VSTS_VERSION 2.136.1

RUN apt-get update \
  && apt-get install -y unzip

# Install Terraform
RUN echo "===> Installing Terraform ${TERRAFORM_VERSION}..."
ADD https://releases.hashicorp.com/terraform/${TERRAFORM_VERSION}/terraform_${TERRAFORM_VERSION}_linux_amd64.zip .
RUN	unzip terraform_${TERRAFORM_VERSION}_linux_amd64.zip \
 && mv terraform /usr/local/bin/terraform \
 && rm terraform_${TERRAFORM_VERSION}_linux_amd64.zip

WORKDIR /agent
RUN useradd vsts

ADD https://vstsagentpackage.azureedge.net/agent/${VSTS_VERSION}/vsts-agent-linux-x64-${VSTS_VERSION}.tar.gz .
RUN tar xzf vsts-agent-linux-x64-${VSTS_VERSION}.tar.gz \
  && ls -la ./bin \
  && ./bin/installdependencies.sh \
  && chown -R vsts:vsts /agent

USER vsts

ENTRYPOINT ["/bin/bash", "-c", "./config.sh --unattended --replace && ./run.sh"]
To the debian:stretch base image, we add Terraform. At the time of this writing, the version just changed from 0.11.7 to 0.11.8. We download terraform, unzip it and make it available. Next we add the VSTS agent. When starting up this agent, it can also take in a couple of environment variables, as described here, where it says that “Any command line argument can be specified as an environment variable. Use the format VSTS_AGENT_INPUT_
Once you have the Dockerfile, you can build it, tag it and push it to your docker registry. In my case that’s the gittetitter registry.
docker build -t vsts-agent-terraform .
docker login
docker tag vsts-agent-terraform gittetitter/vsts-agent-terraform
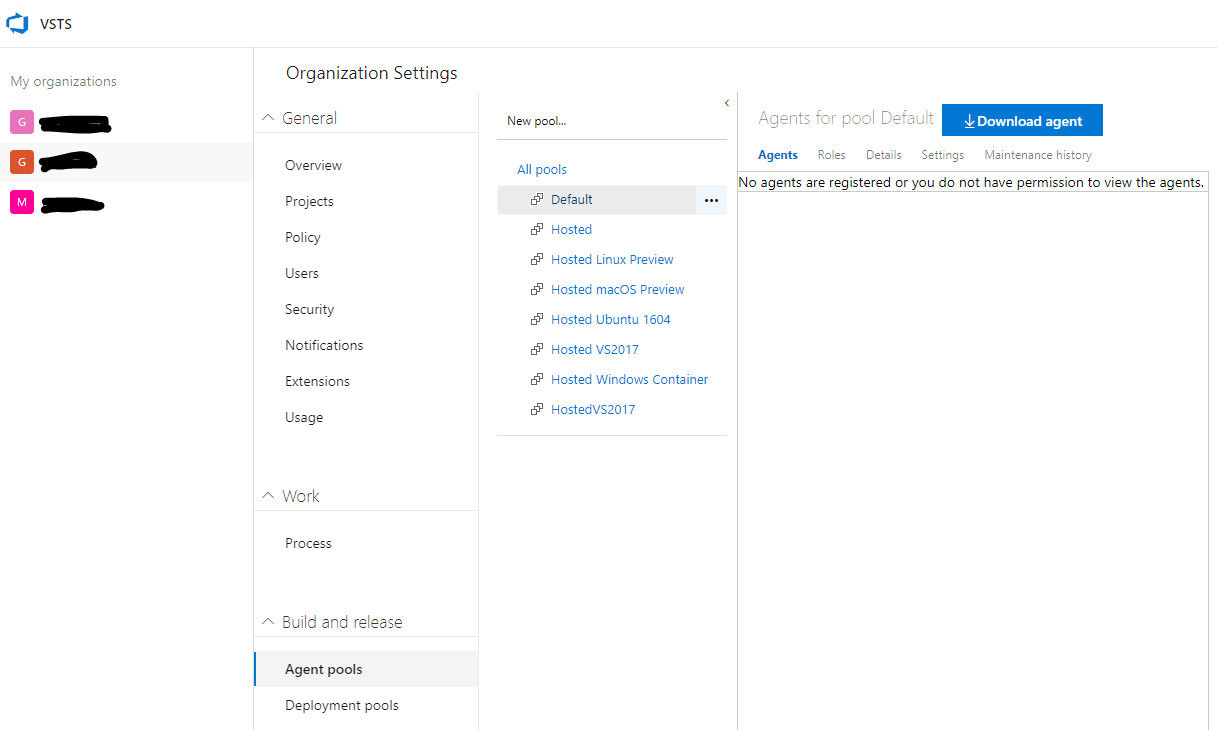
docker push gittetitter/vsts-agent-terraformNext in VSTS we’ll create an agent pool. This pool can be used to group all of your custom ACI agents together. To do this, on the main VSTS screen, go to ‘Admin Settings’ (bottom left of the screen) and then under ‘Build and Release’ you’ll find ‘Agent Pools’. Here you can click ‘New pool’. Once we run the ACI VSTS agent on the fly, you will see it pop up in this agent pool.
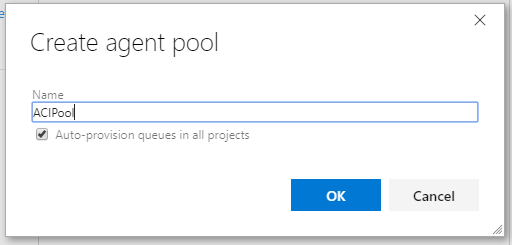
Give your pool a name and click OK.
Once we have our custom agent pool and our custom docker container up in dockerhub, we can go back to our release pipeline. What we want to do in our pipeline is spin up the docker container right at the beginning of our release pipeline, do whatever we need to do during our release phase and then spin the container down again.
To do this, we will add an extra agentless phase to our pipeline.

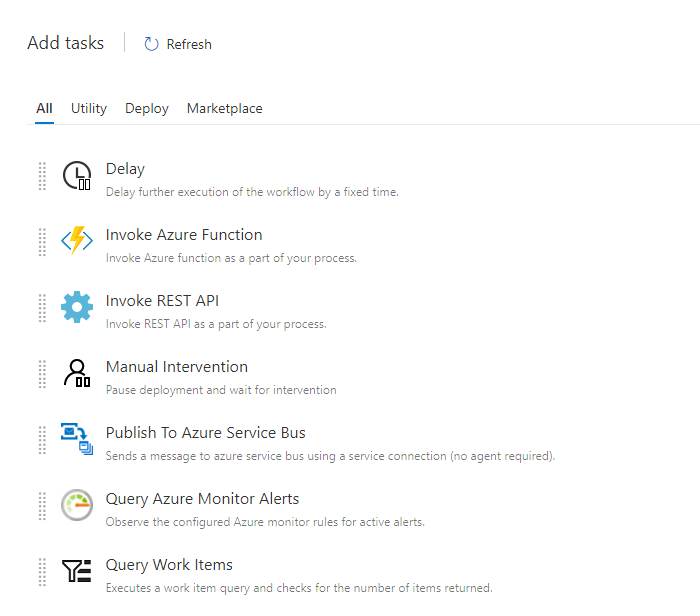
Once created drag and drop it so it sits before the already existing agent phase. Click the + sign on the right of the agentless phase to add tasks to it. As you will notice, not a lot of build-in tasks can be used in an agentless phase. We will make use of the ‘Invoke Azure Function’ task for starting up our agent. Add it to your agentless phase by clicking on it and pressing the ‘Add’ button.
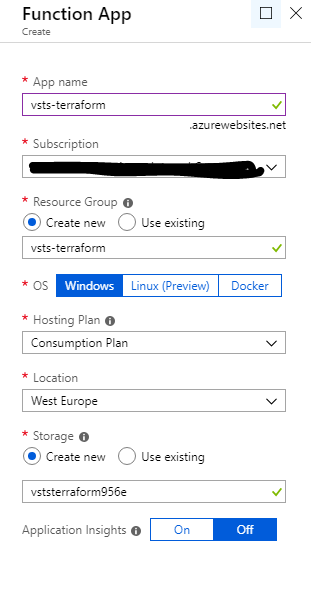
If you select the newly added Azure Function task, you will see it needs some settings, like the function URL. So first, we will need to create this azure function. We could again do this through Terraform. But in this case, I’ll utilize the Azure Portal (it would be totally meta otherwise). In the Portal, click ‘Create a Resource’ and choose Function App. Pick a name for your function app, create it in a new resourcegroup and choose the consumption plan.
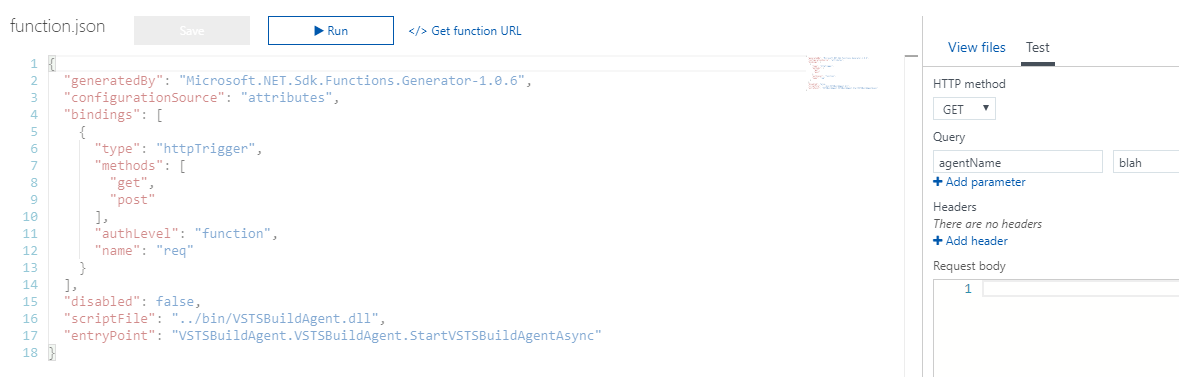
The code for this function app, we will write in Visual Studio. Open VS 2017 and create a new project for a function app. For the type of the function app, take a HttpTriggered function. I added the following code:
using System;
using System.Collections.Generic;
using System.Configuration;
using System.Linq;
using System.Net;
using System.Net.Http;
using System.Threading.Tasks;
using Microsoft.Azure.Management.Fluent;
using Microsoft.Azure.Management.ResourceManager.Fluent;
using Microsoft.Azure.Management.ResourceManager.Fluent.Authentication;
using Microsoft.Azure.WebJobs;
using Microsoft.Azure.WebJobs.Extensions.Http;
using Microsoft.Azure.WebJobs.Host;

namespace VSTSBuildAgent
{
    public static class VSTSBuildAgent
    {
        private static IAzure _azure = null;

        [FunctionName("StartVSTSBuildAgent")]
        public static async Task<HttpResponseMessage> StartVSTSBuildAgentAsync([HttpTrigger(AuthorizationLevel.Function, "get", "post", Route = null)]HttpRequestMessage req, TraceWriter log)
        {
            var rg = await AzureConn.ResourceGroups.GetByNameAsync(ConfigurationManager.AppSettings["resourceGroupName"]);
            var agentName = await GetNameAsync(req, "agentName");
            var env = new Dictionary<string, string>
            {
                { "VSTS_AGENT_INPUT_URL", ConfigurationManager.AppSettings["VSTS_AGENT_INPUT_URL"] },
                { "VSTS_AGENT_INPUT_AUTH", "pat" },
                { "VSTS_AGENT_INPUT_TOKEN", ConfigurationManager.AppSettings["VSTS_AGENT_INPUT_TOKEN"] },
                { "VSTS_AGENT_INPUT_POOL", "ACIPool" },
                { "VSTS_AGENT_INPUT_AGENT", agentName }
            };

            var containerGroup = await AzureConn.ContainerGroups.Define(agentName)
                .WithRegion(rg.RegionName)
                .WithExistingResourceGroup(rg)
                .WithLinux()
                .WithPublicImageRegistryOnly()
                .WithoutVolume()
                .DefineContainerInstance(agentName)
                    .WithImage(ConfigurationManager.AppSettings["imageName"])
                    .WithoutPorts()
                    .WithEnvironmentVariables(env)
                    .Attach()
                .CreateAsync();

            return req.CreateResponse(HttpStatusCode.OK, "VSTS agent is running");
        }

        private static async Task<string> GetNameAsync(HttpRequestMessage req, string key)
        {
            // parse query parameter
            var name = req.GetQueryNameValuePairs()
                .FirstOrDefault(q => string.Equals(q.Key, key, StringComparison.OrdinalIgnoreCase))
                .Value;

            // Get request body
            dynamic data = await req.Content.ReadAsAsync<object>();

            // Set name to query string or body data
            return (name ?? (string)data?.name).ToLower();
        }
        private static IAzure AzureConn
        {
            get
            {
                if (_azure == null)
                {
                    var tenantId = ConfigurationManager.AppSettings["tenantId"];
                    var sp = new ServicePrincipalLoginInformation
                    {
                        ClientId = ConfigurationManager.AppSettings["clientId"],
                        ClientSecret = ConfigurationManager.AppSettings["clientSecret"]
                    };
                    _azure = Azure.Authenticate(new AzureCredentials(sp, tenantId, AzureEnvironment.AzureGlobalCloud)).WithDefaultSubscription();
                }
                return _azure;
            }
        }
    }
}
This uses the Microsoft.Azure.Management.Fluent nuget package and the System.Configuration.ConfigurationManager package. The first gives you an easy interface for manipulating Azure resources. In the StartVSTSBuildAgentAsync we use the AzureConn for creating a containerGroup. Because we send along a set of environment variables it will be able to connect to your VSTS instance. These are the environment variables our docker image needs. The AzureConn itself will use a service principal so it can authorize itself for creating Azure resources. We will create this service principal in one of the next steps.
We will also add the StopVSTSBuildAgenttAsync method to this same function app. Just add it to the same class.
[FunctionName("StopVSTSBuildAgent")]
public static async Task<HttpResponseMessage> StopVSTSBuildAgenttAsync([HttpTrigger(AuthorizationLevel.Function, "get", "post", Route = null)]HttpRequestMessage req, TraceWriter log)
{
var agentName = await GetNameAsync(req, "agentName");
await _azure.ContainerGroups.DeleteByResourceGroupAsync(ConfigurationManager.AppSettings["resourceGroupName"], agentName);
return req.CreateResponse(HttpStatusCode.OK, "VSTS agent has been removed");
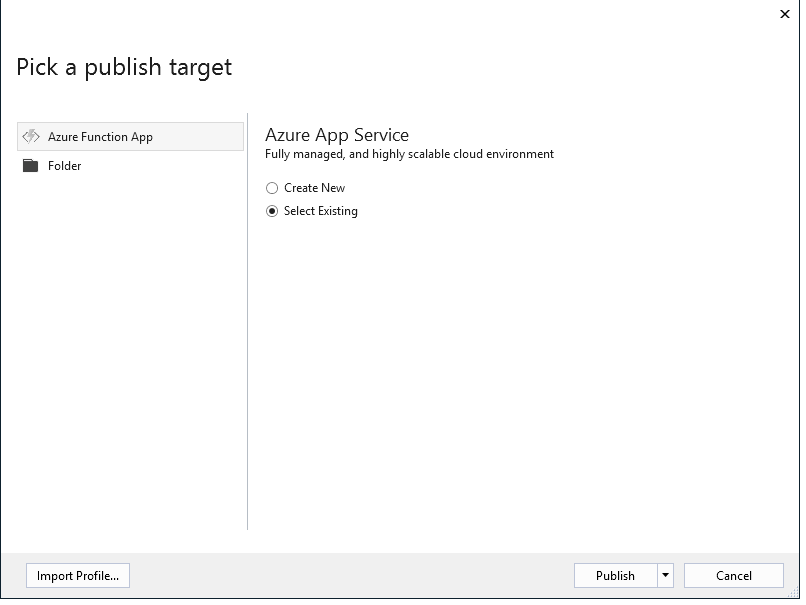
}We will now publish this function app directly from Visual Studio. Right click on the project and select ‘Publish’ from the context menu. Select ‘Select Existing’ for the app service.
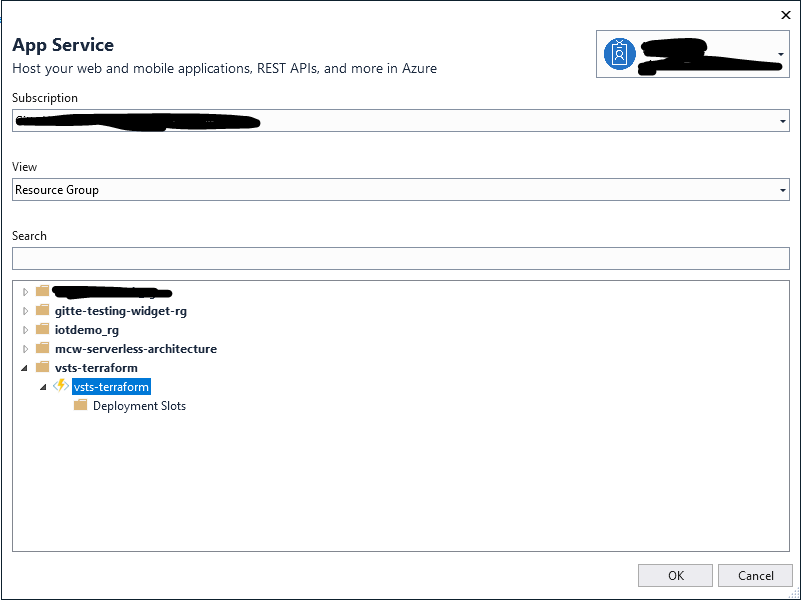
Next, select the function app you created through the portal.
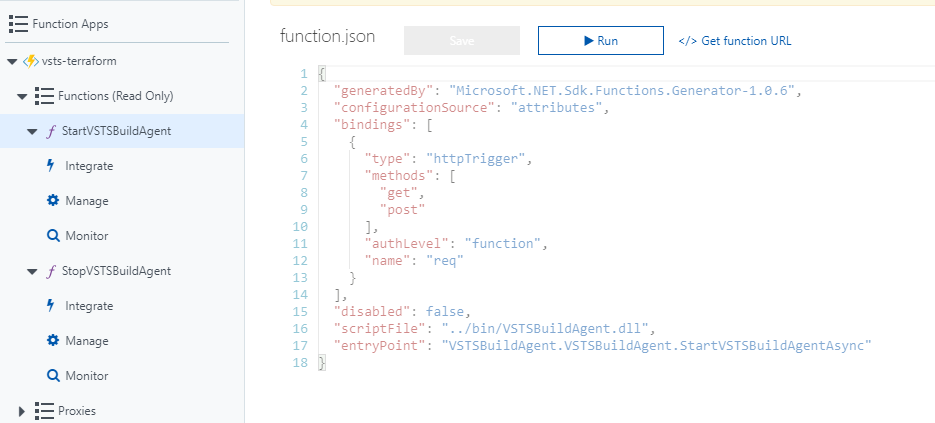
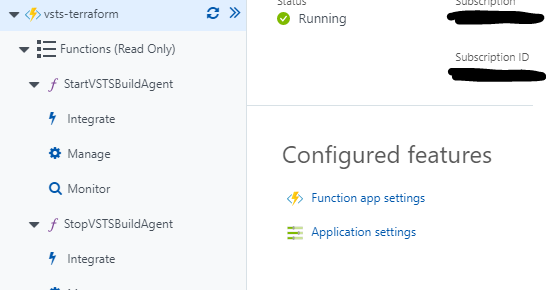
Once the function got published, you will see both functions pop up in the Azure portal.
We still need to provide a couple of app settings, though. We will set these in the Azure portal. Click on the top-level ‘vsts-terraform’ app definition in the left menu of the portal. Here you can find the Application settings.
A couple off these settings you can already provide, but a couple of others, we still need to generate/get:
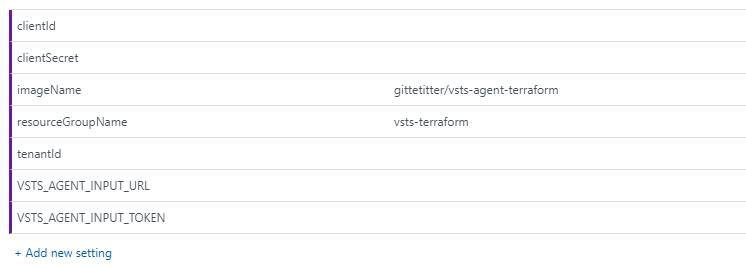
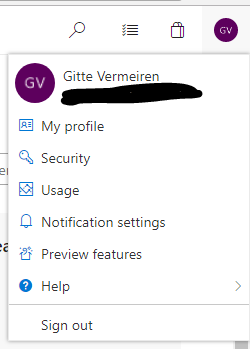
So first, for the VSTS_AGENT_ app settings. The VSTS_AGENT_INPUT_URL, this is the url of your VSTS instance, so https://{your-organization}.visualstudio.com. For the VSTS_AGENT_INPUT_TOKEN we need to generate a Personal Access Token or PAT token. For this, go to your VSTS instance and go to your security settings.
Next add a new PAT token and give it authorization on the agent pools.
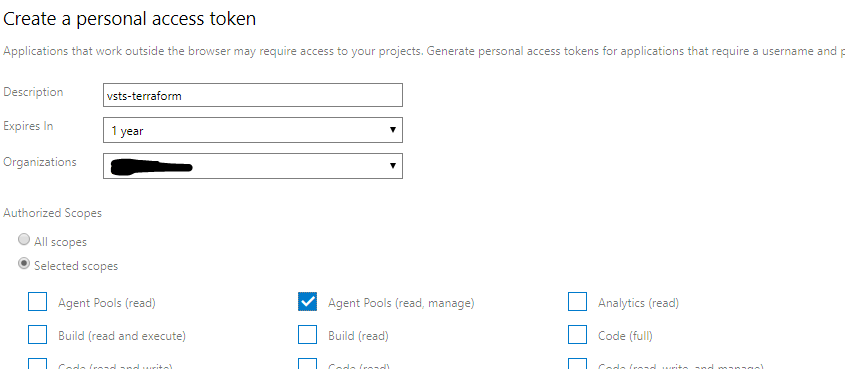
Once created, copy the token and put it in the app setting of your function app.
For your tenant ID, issue the following Azure CLI statements in a command window:
az login
az account list
The account list will give you your list of subscriptions, take the default one and copy the tenantId. Last step for the app settings will be creating a service principal. You can do this again through CLI.
az ad sp create-for-rbac --name vsts-terraformOnce created copy the appId in the clientId app setting and copy the password in the clientSecret app setting. Don’t forget to save your app settings once you’re done.
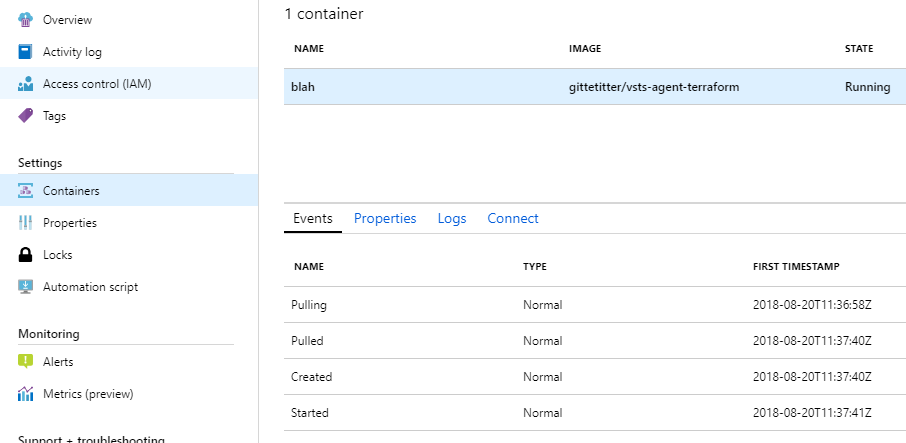
With this, we have our function ready to start and stop our build agent. Before we start calling our function from our release pipeline, let’s first start it directly from the portal, to see whether everything is wired up correctly. Go back to your StartVSTSBuildAgent function in the portal and click the ‘Test’ menu on the right. This will bring up the test window. Add a Query parameter ‘agentName’ and give it a value. Once you have this, you can click the ‘Run’ button.
If everything goes well, you should see a new ACI resource pop up in your vsts-terraform resource group. Also, while the ACI is running, you will see a ‘blah’ agent in your ACIPool in VSTS.

You can also go and watch the container events from this resources. If all is configured correctly, the container should have started.
You can now perform the same test with the StopVSTSBuildAgent function. This should stop and remove the ACI container.
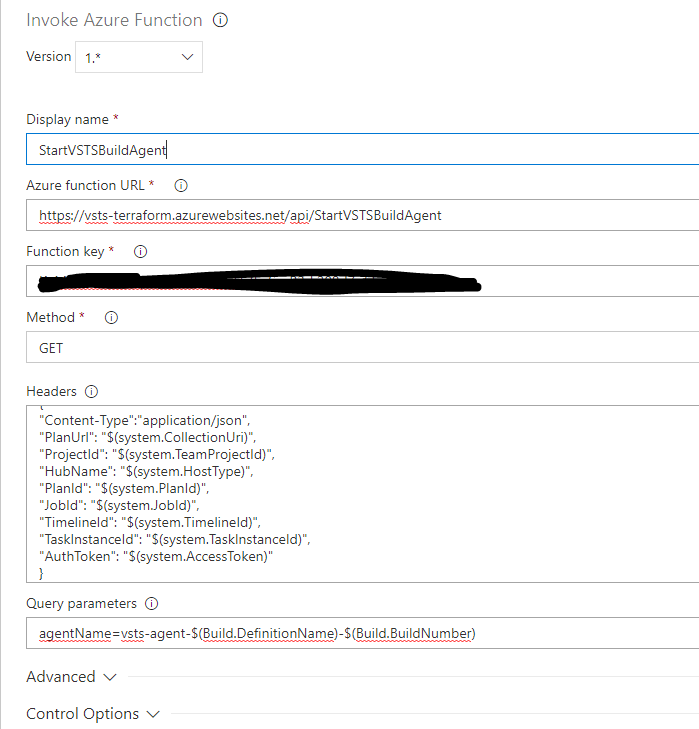
We are now ready to call our function from our release pipeline. First, still in your function in the Azure portal, go back to the StartVSTSBuildAgent function and click ‘Get function URL’. Once you have this copied, go back to the window where we were creating our release pipeline and paste the function url in the ‘Azure Function URL’, but without the ‘?code…’ part. The actual function key you will paste in the ‘Function key’ textbox. We will also send along the name for the agent we want created. For this we use our builddefinition name and number.
Maybe best to also hit save for your release pipeline.
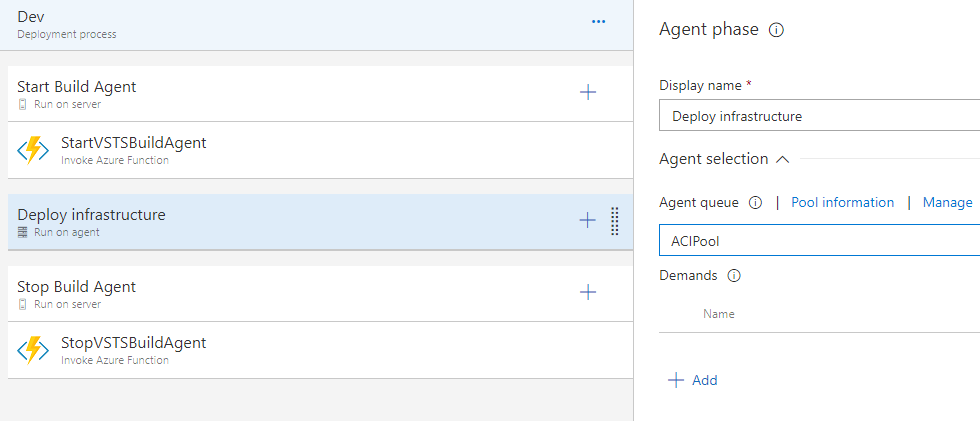
Now, create another serverless phase for calling the StopVSTSBuildAgent function. The configuration of this one is similar to StartVSTSBuildAgent.
Once the phase for stopping the agent has been configured, click on the middle agent phase and indicate you want it to run on the ACIPool.
Save your changes. We can now try out our release pipeline. Create a new release and deploy this release.
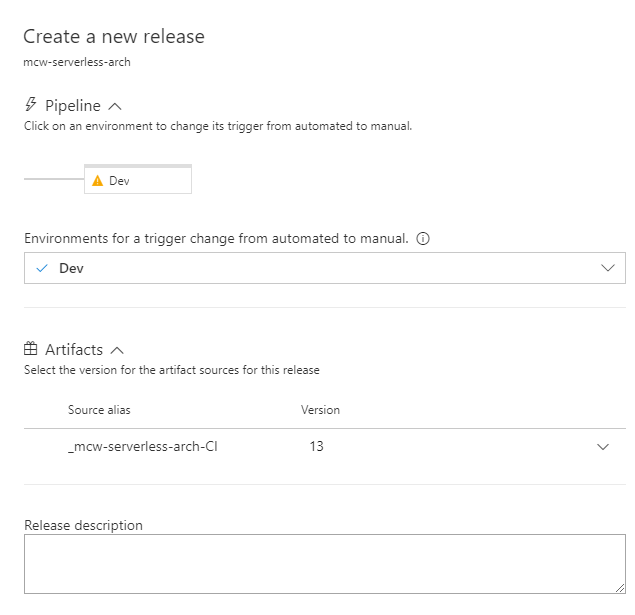
If you click on the link of your new release, it will show you the details.
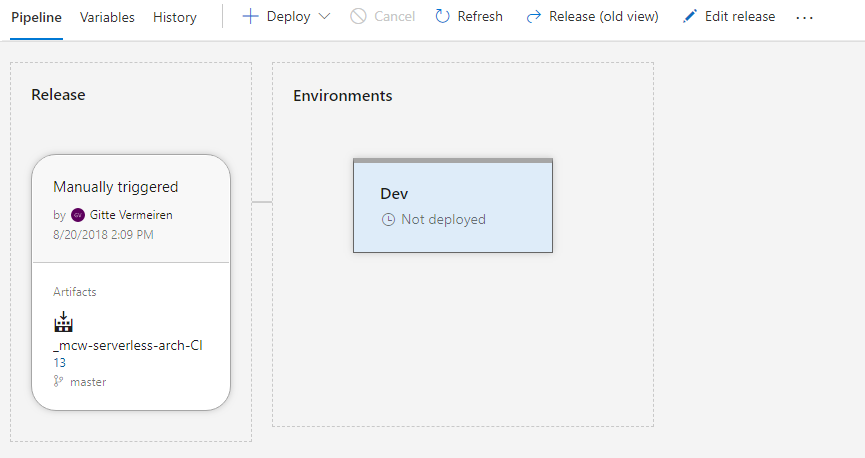
You can now deploy the release.
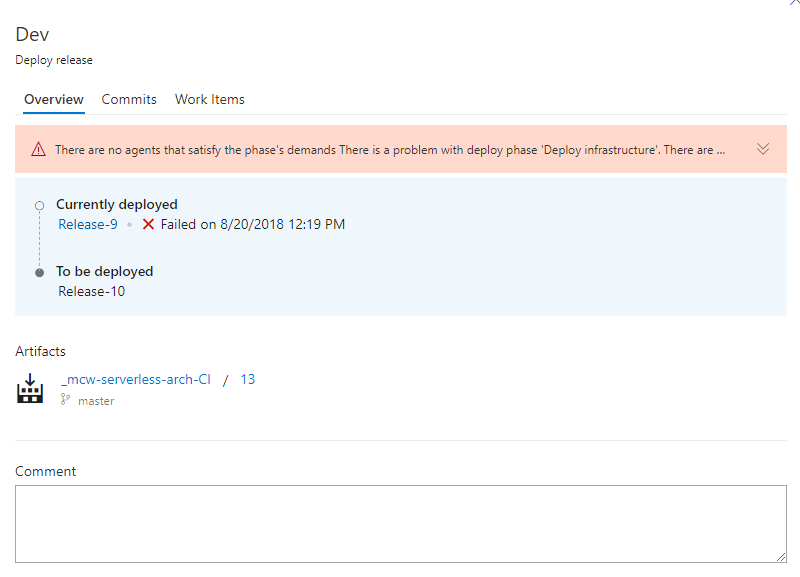
It will give you a warning that there are currently no agents which can run your release, but don’t worry about that, since we will be creating our agent on the fly.
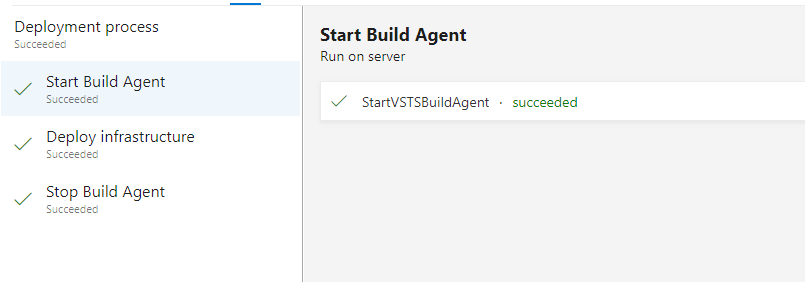
If you click the ‘Queued’ link in your release, you can follow along with the different steps. If all goes well, each step should execute.
And that concludes part 2 of this blog post. I must say, it was a much more painful experience than I had expected. I bumped into a couple of walls, like the image being too big in the beginning and a couple of function runs where things failed and I couldn’t see why. One golden tip on that: turn on app insights on your function, otherwise you won’t see the actual exception message. Also, the solution involves quite a lot of moving parts. But once you have this together, it works pretty nice.
In part 3 I will go over the actual Terraform deployment process, but since this post is already quite long, I’ll keep that for a next chapter.